26 December 2012

Pie #27: Christmas Pie (Pumpkin Pecan Pie)

Christmas Day 2012:
  • Delicious breakfast of blackberry ricotta scones and veggie egg casserole
  • Christmas morning jokes via the web with Serbian guests Lane and Banysha, French guests Kirsty and a few heberge, Archbold guests Bret and Wandi, and those that live here
  • Marvelous and MOM - more Christmas guests from the NW, bearing delicious dishes - tastes of old and new
  • Jackson, a witty friend and great addition to our Christmas gathering
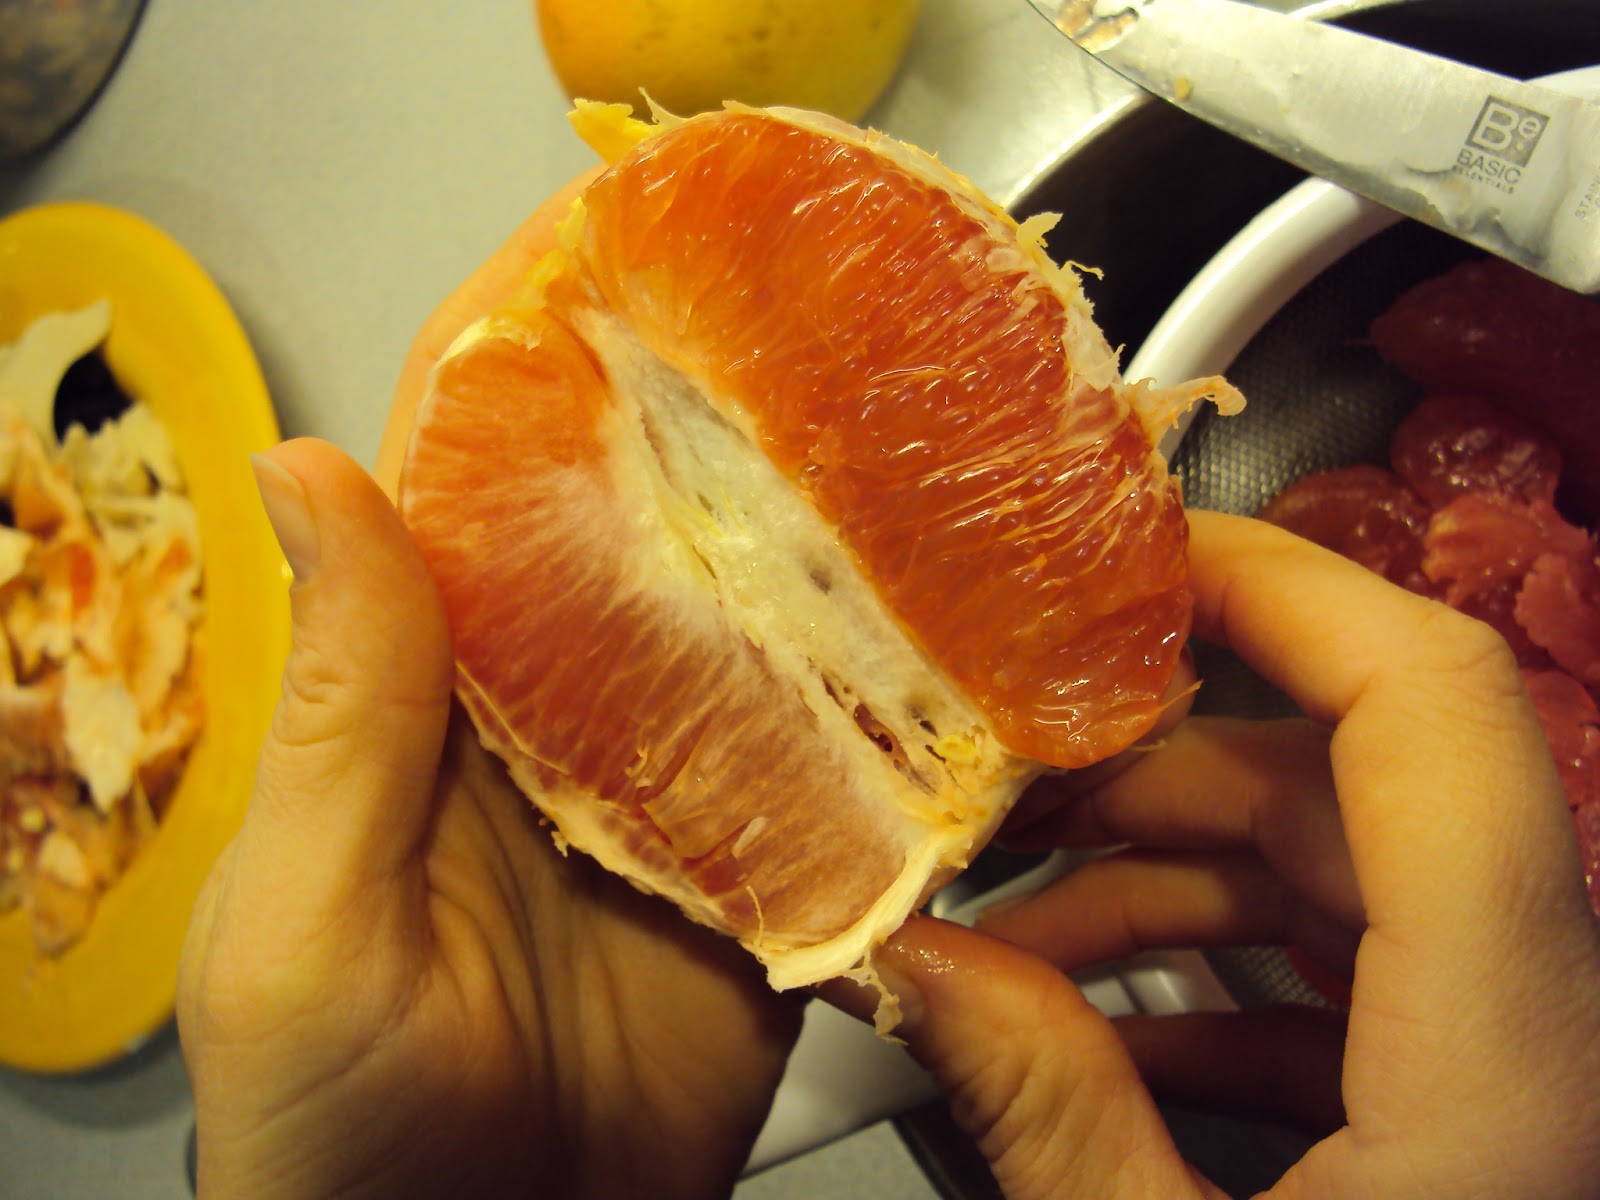
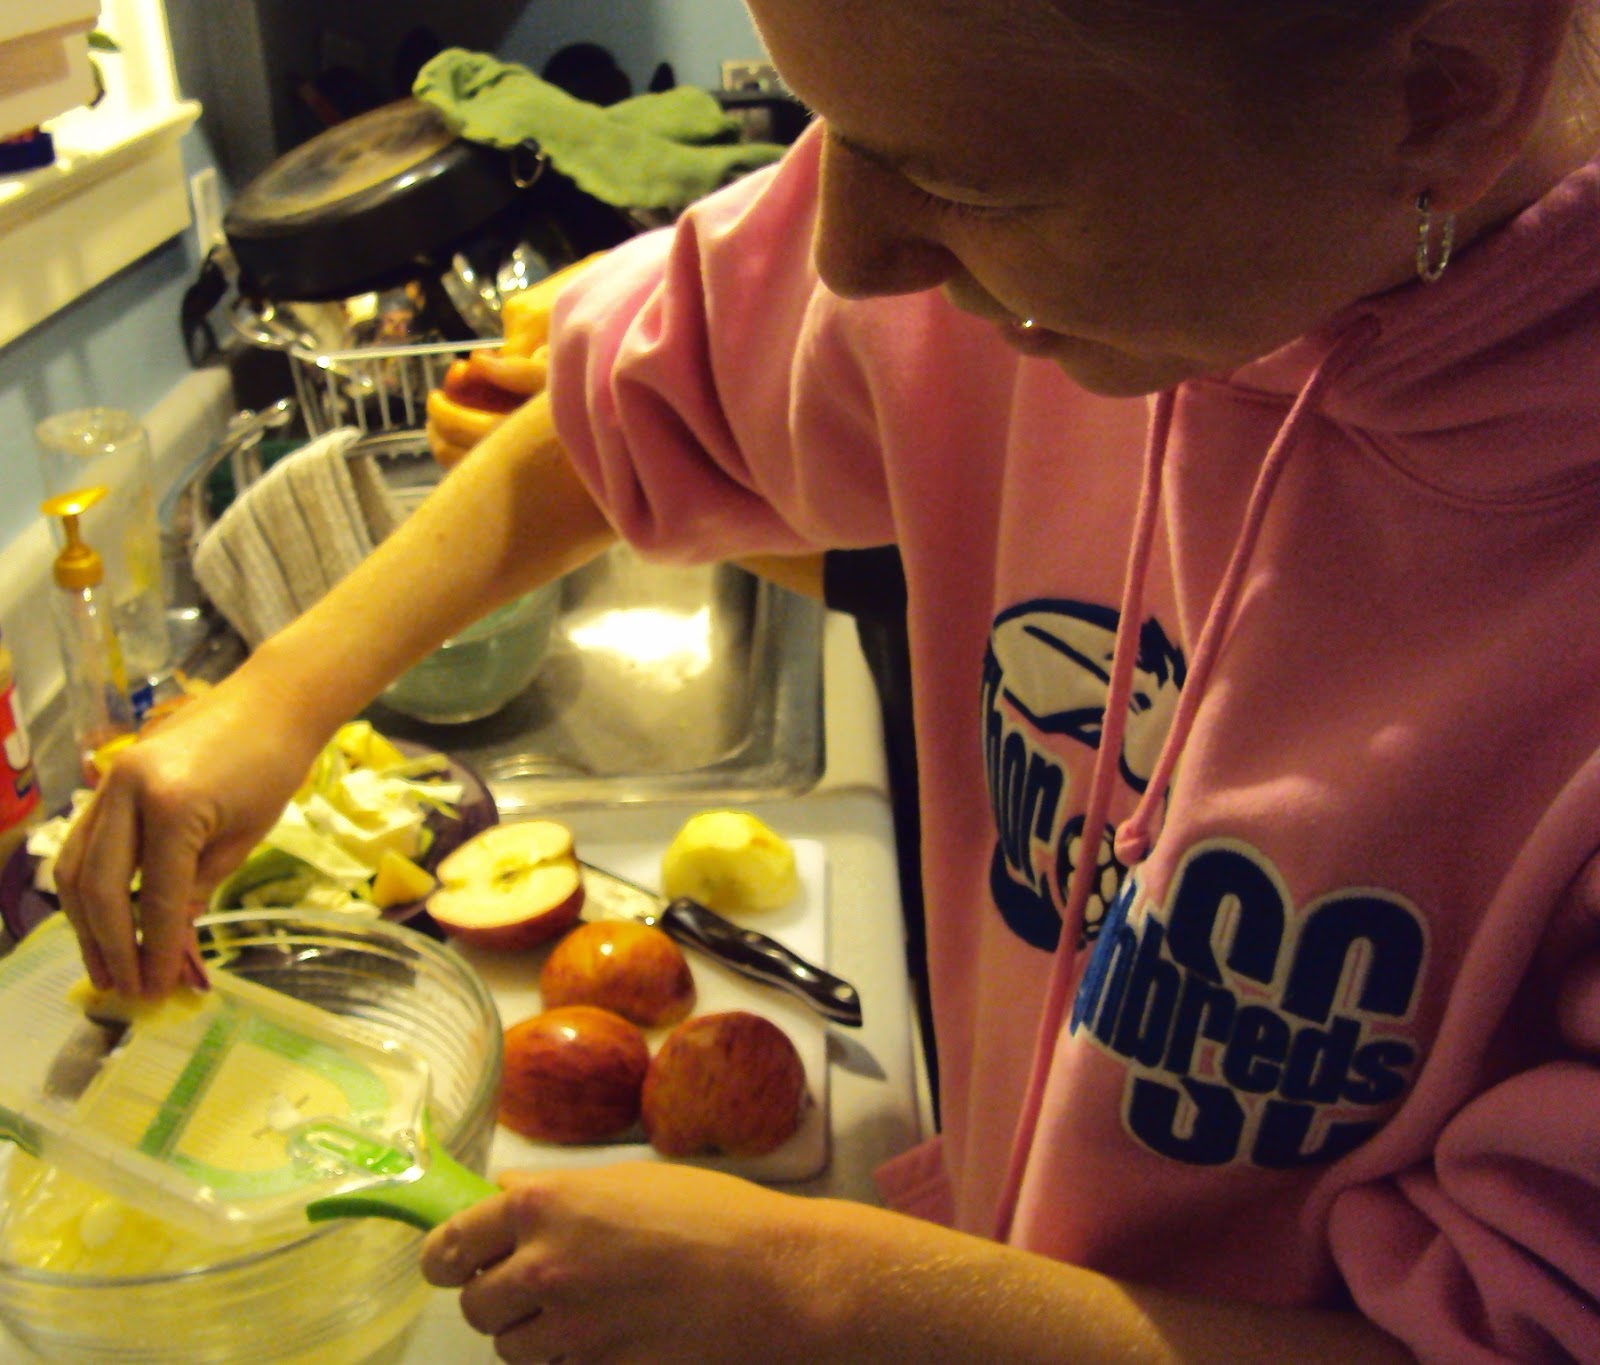
  • Lots of hands helping to peel, chop, grate, stir, wash, and dry
  • More food than needed - each dish combining to make dinner complete
  • Leftovers boxed up for Katie, the nighttime nurse needing to sleep through dinner - the rest stored away for an impending blizzard
  • Several rounds of post-dining Scum, complete with a lesson on bragging
  • Bittersweet goodbyes - with promises of an imminent visit
  • First round of leftover dining, whether hungry or not
  • An unexpected partner swap for the nightly rounds of Euchre - more lessons about the many rules
  • Cookies and Chex-Mix eaten to fill in the cracks, or because they were simply placed too near the game table
  • Snuggling in for slumber after a wonderful day

%%%%%%%%%%%%%%%%%%%%%%%%%%%%%%%%%%%%%%%%%%%%%%%%

Pumpkin Pecan Pie
Simply in Season (at our house aka "The Season Cookbook")

Mary Beth Lind and Cathleen Hockman-Wert

Ingredients:
9-inch pastry shell

1 cup / 250 ml pumpkin or sweet potato (cooked, pureed)
3/4 cup / 175 ml light corn syrup
1 cup / 250 ml pecans (chopped)
3 eggs (beaten)
1/3 cup / 75 ml brown sugar
1/4 cup / 60 ml butter (softened)
1 teaspoon vanilla
1/2 teaspoon salt

Pie Algorithm:
1. Beat together with an electric mixer.

2. Pour into pie shell.  Bake in preheated oven at 350F / 180C until set, 45-55 minutes.

%%%%%%%%%%%%%%%%%%%%%%%%%%%%%%%%%%%%%%%%%%%%%%%%

Easy-to-make and delicious, a perfect combination!  The pie was softer and sweeter than a typical pumpkin pie, but not as sweet as a typical pecan pie.  It reminded me of sweet potato casserole - the kind with a pecan praline topping, not the marshmallow one.  A welcome addition to the end of a delicious meal!

21 December 2012

Pie #26: Halfway Pie (Pear Pie with Asiago Cheese Crumble)


It's time to celebrate - half the pies for this project have been created and consumed!  I have to admit that around Pies #16, 17, and 18 I was about ready to call it quits.  I think this probably had more to do with all the school items on my plate, but nonetheless I was nearly tired of making (and believe it or not...eating!) pie.  However, I'm back to full steam and look forward to creating and tasting something new each week!

Last week I received an email from Travis with a crumb topping recipe that I simply could not turn down!  For various reasons I tweaked the recipe slightly; my version follows.


%%%%%%%%%%%%%%%%%%%%%%%%%%%%%%%%%%%%%%%%%%%%%%%%%

Pear Pie with Asiago Cheese Crumble

Ingredients:

1 pie shell

filling:
pears
1/3 c. sugar in the raw
1 t. cinnamon
1 T. cornstarch
1/8 t. fresh-ground salt

crumble topping:
1/2 c. flour (I wanted to use whole wheat, but I was out)
1/2 c. brown sugar, packed
1/2 c. Asiago cheese, grated (next time I would make this a heaping 1/2 c.)
1/4 t. fresh-ground black pepper (next time I would do a bit less)
3 T. cold butter in chunks

Pie Algorithm:
1. Filling: Mix sugar, cinnamon, cornstarch, and salt in small bowl.  Set aside.  Peel, then thinly slice pears into pie crust.  Use enough pears to nearly fill crust.  Pour dry mixture over pears.

2. In medium-sized bowl, cut butter into flour, sugar, and pepper until butter is pea-sized.  Stir in cheese to mix.  Top the pie with this mixture, coating well.

3. Bake for 10 min at 425F, then turn heat down to 350F and bake for 40-50 min more or until filling is bubbling and thick.

%%%%%%%%%%%%%%%%%%%%%%%%%%%%%%%%%%%%%%%%%%%%%%%%%


My first response to this pie was WOW!  Often while pies are baking I like to turn on my oven light to watch them.  Many times the smell is as lovely as the view.  This time, the baking experience was extreme - the aroma of the cheese was almost unbearable (in a good way).  Multiple times I found myself wandering into the kitchen, drawn in by the smell of the warm Asiago.  It was the first time that I simply could not wait to try the result!

I am not disappointed!  The texture of the soft pears combined with the crunchy topping is delightful.  In parallel, the sweetness of the filling combined with the savory topping cannot be beat!  The flavor of the cheese is subtle but not absent; the pepper gives the pie a bit of a warm kick.  I definitely recommend eating the pie warm, and with a dollop of whipped cream if you so desire.  This pie is not recommended for all audiences; I understand that some people only like sweet pies.  However, I definitely will keep it in my repertoire!

13 December 2012

Pie #25: FFA Pie (Grapefruit Pie)

I think I have finally found a pie Perry won't eat!  Before the big reveal, let me remind you that he didn't have a problem with Pie #5 that had zucchini,  Pie #8 that had corn milk, or Pie #16 that had green tomatoes.  One would think that after all these weird ingredients that he'd be up for anything, but one would be wrong.  Perry is not excited about eating...Grapefruit Pie.

Grapefruit seems to be a food that people either love or hate.  I love it - Perry hates it.  Granted, the pith and inner membrane of the grapefruit are very bitter.  However, when these are removed and you bite into a juicy section of pure grapefruit flesh...WOW - an excellent combination of sweet and tart!

You may be wondering, "Why grapefruit pie?  Have you run out of ideas?"  This pie actually comes from surplus rather than from a shortage.  As mentioned above, I love grapefruit.  Thus when Perry's cousins are selling fruit to support their FFA Chapter, I always purchase a partial case.  However I was a bit overeager this year, and ended up with an entire case!  Yes folks, that means I have 40+ grapefruits to savor...or at least to eat as fast as I can while they are still good!  Kathy mentioned that she had eaten jello recently with grapefruit pieces in it.  Combining this idea with the idea of strawberry jello pie that I enjoyed as a kid, I had the pie of the week!

I have good childhood memories of Wanda standing at the sink sectioning grapefruits for the family to share.  You can find a plethora of tutorials online teaching you how to section a grapefruit, but none are quite like Wanda's method.  When sectioning grapefruit, I always use her method.  In case you are interested, there are step-by-step instructions and pictures below.

##################################################################################

1. Peel the tough outer skin from the grapefruit - there is no need to pull off all the extra white pith that remains.  Separate the grapefruit into two parts.


2. Slide a knife just under the top layer of skin in the center of the fruit. 


3. Once you make a slit in the center, the skin will pull away easily from that section.  Pull away all skin covering the section on which you are working.  There may remain a bit of skin on the outside edge of that section - this is ok!


4. Separate the exposed flesh from the remaining sections.  Two techniques that work well are sliding your thumb under the flesh near the middle of the fruit (in the area where you made the slit), or leveraging the fruit from the outside edge (see picture).


5. Lastly, pull the fruit from the skin that remained on the outside edge of the section.  Repeat from Step 2 until the entire grapefruit is sectioned.


##################################################################################

This method takes a bit of practice, but eventually you can do a whole grapefruit quickly without damaging any of the sections.  Sectioning grapefruit for this pie is a good way to practice - you need to section four grapefruits and it doesn't matter if the flesh comes out in small pieces instead of whole sections.

When browsing for recipes to use, I found a recipe on a blog entitled Making a Living.  This recipe uses strawberry jello, which masks the grapefruit flavor.  For some this may be a positive thing...for me, not so much.  Therefore, I chose to create my own recipe using non-flavored gelatine and fresh-squeezed grapefruit juice.

%%%%%%%%%%%%%%%%%%%%%%%%%%%%%%%%%%%%%%%%%%

Grapefruit Pie

Ingredients:
1 9-inch blind-baked pie crust

6 grapefruits
2, 1-oz. envelopes Knox (unflavored) Gelatine
1/2 c. sugar

whipped topping (see Pie #3)

Pie Algorithm:
1. Place a medium-sized strainer inside a bowl.  Peel and section 4 grapefruits (see method above).  As you are sectioning the grapefruits, tear the sections into small, thumb-width sized chunks.  Place these sections in the strainer.  When finished sectioning, set this bowl aside to collect the excess grapefruit juice dripping from the chunked sections.

2. Juice the remaining two grapefruits.  (I ended up running my juice through a strainer to collect all the small seeds that fell into the juice.)  Put 1/2 cup of the juice in a large heat-proof bowl - set aside.

3. Combine sugar and 1 cup of remaining juice in a saucepan.  Place on medium-high heat until boiling, stirring occasionally.  Approximately 1 minute before boiling (make your best guess on the timing), sprinkle the two Knox packets over the cold juice waiting in the large bowl.

4. When juice mixture boils, stir it into the cold juice and gelatine mixture.  Stir until gelatine dissolves completely - around 5 minutes.  Let juice cool slightly, then mix in the sectioned grapefruit.  Pour grapefruit and gelatine into pie crust.  (Any remaining mixture can be put in a bowl to eat separately!)  Place pie in fridge and wait for gelatine to solidify.

5. Cover with whipped topping before serving.

%%%%%%%%%%%%%%%%%%%%%%%%%%%%%%%%%%%%%%%%%%

 
Biting into this pie is like biting into a solid chunk of pie-shaped grapefruit.  The flesh is very juicy, and the gelatine blends in nicely.  For someone seeking a very sweet dessert, more sugar would be needed.  The whipped topping helped with the tartness, though I would be happy to eat the pie without the topping!  As is, the flavor of the pie is simply the flavor of the grapefruit.  For what more could I ask?

08 December 2012

Pie #24: Operations Research Pie (Brown Sugar Buttermilk Pie)


In undergrad one of my favorite courses was Operations Research.  For me this course was an introduction to the use of optimization in complex decision-making processes.  I LOVED this course as solving the problems was always like solving a fun scheduling puzzle.

This morning while working on the week's pie I felt a bit like I was back in operations research mode.  I had certain projects I was trying to finish, I needed to run several errands, and I only had a certain amount of time to complete everything.  In the end, I won!  I solved the scheduling puzzle and was able to finish everything on my list in the allotted time.

This week's pie again came from Ashley English's book A Year of Pies: A Seasonal Tour of Home Baked Pies.  However, this recipe was submitted by a guest author named Tom Mazurek.  There are a few notes I would like to add to the recipe.  First, I added the cinnamon to the recipe below.  Second, the pie expands tremendously.  When I first poured the filling in the crust, I was afraid that the pie wasn't going to be thick enough.  However, while the pie was baking, it expanded to 2 inches higher than the crust.  (It sank back to normal size as it cooled.)


%%%%%%%%%%%%%%%%%%%%%%%%%%%%%%%%%%%%%%%%%%%%%%%%

Brown Sugar Buttermilk Pie
Tim Mazurek
www.lottieanddoof.com

Ingredients:

single 9-inch pie crust

3 large eggs
1/3 c. sugar
1/2 c. (packed) light brown sugar
2 T. flour
6 T. butter, melted and cooled
1 c. buttermilk
1 t. vanilla
1/2 t. ground nutmeg
pinch of salt
dusting of ground cinnamon

Pie Algorithm:
1. Preheat the oven to 375F.  In large bowl, whisk the 3 eggs with both sugars and the flour, making sure there are no lumps.  Add the melted butter, buttermilk, vanilla, nutmeg, and salt.  Whisk to combine.

2. Pour the filling into the prepared crust and dust with cinnamon.  Place in the preheated oven.  Turn the oven down to 325F and bake for 45-60 minutes, or until the edges are set and the center is still a little wobbly.  Remove the pie from the oven and let it cool for at least 30 minutes before serving warm or at room temperature.

%%%%%%%%%%%%%%%%%%%%%%%%%%%%%%%%%%%%%%%%%%%%%%%%


I debated on naming the pie 'Meh Pie' as I wasn't super impressed with the results.  It ended up with the consistency of a custard, but the filling wasn't very exciting.  Instead it was rather bland.  The edges got a bit darker than I had hoped, but I'm not really sure how to counteract this since it had risen so high.  Overall Perry has been pretty positive about the pies I've made for this project.  However, this time he commented that he wouldn't pick this pie if he had a choice. 

01 December 2012

Pie #23: Cookie Sunday Pie (Salted Pecan Mini Pies)

I've come to the point in my pie project where I'm not willing to make a pie until I have pie-eaters lined up.  Contrary to what Perry may tell you when I'm not around, he and I cannot eat all the pies that are flying out of my kitchen!  Thus, when I received an email from the church office to remind us that this is our month to contribute cookies for Cookie Sunday, I knew where my pie(s) were going to go!

Cookie Sunday happens at Columbus Mennonite on the first Sunday of every month.  Attendees gather after the service to munch on snacks (cookies, fruit, crackers, ... this month mini pies, etc) and drink coffee and tea.  This is a great time to catch up with people you know, as well as a time to talk to those in the congregation whom you don't know as well.

This week's recipe came from A Year of Pies: A Seasonal Tour of Home Baked Pies by Ashley English.  I've been on the library waiting list for this book since it came out in August, and finally worked my way to the top.  I really like that the recipes in the book are separated by season, and look forward to trying several of them!  Actually to be truthful, based on all the beautiful pictures in the book,  I'm having a hard time not trying ALL of the recipes!  I had some quantity issues with the recipe - the recipe states that it makes 36 mini tarts, but I was only able to get around 26 tarts.  I've changed the recipe slightly to reflect what I used for 24 tarts, as well as to simplify the directions in some parts.


%%%%%%%%%%%%%%%%%%%%%%%%%%%%%%%%%%%%%%%%%%%%%%%%

Salted Pecan Mini Tarts
From: A Year of Pies: A Seasonal Tour of Home Baked Pies
by: Ashley English

Ingredients:
enough dough to make one 9-inch pie crust

filling:
1/2 c. (packed) light brown sugar
2 T. unsalted butter, melted
1 large egg
1/2 t. vanilla extract
1/2 t. ground nutmeg
1/4 t. sea salt
3/4 c. pecans, chopped

1 T. coarse sea salt, for sprinkling

Pie Algorithm:

1. Prepare the crust
Roll out the chilled dough on a lightly floured surface into a 12- or 14-inch circle.  Cut out 24 rounds, using a 2 1/2 inch round biscuit or cookie cutter.  You may have to reroll the dough scraps several times to cut out all the rounds.  Do so quickly, as the more the dough is rolled, the more it activates the gluten in the wheat, which can result in toughened dough.

Place one dough round in each mini tart pan.  (See the picture of the little stirrups Perry made so we could slide these little guys right out when they were finished!)  Press the dough flat against the bottom and up the sides of the pan.

Put the tart pans in the refrigerator to chill for 20 minutes.  Meanwhile preheat the oven to 325F.

Bake the chilled crusts for 8 minutes.

Remove the baking sheets from the oven.  Turn the heat up to 375F.  Set the mini tart crusts aside to cool while you prepare the filling.


2. Prepare the filling
Combine the brown sugar, butter, egg, vanilla, nutmeg, and salt in a medium-sized bowl.  Whisk to blend thoroughly, then stir in the chopped pecans.


3. Assemble the mini tarts
Spoon 1 1/2 t. of the filling into each mini tart shell, then sprinkle each with several granules of coarse sea salt.

Bake in the 375F oven for 25 minutes, until the tops are lightly browned.

Cool the mini tarts at least 15 minutes before serving.

%%%%%%%%%%%%%%%%%%%%%%%%%%%%%%%%%%%%%%%%%%%%%%%%

Cutting out all the little crusts takes quite a bit of time, but the filling is so quick and easy the entire process isn't too bad.  Let's hope the 'cookie eaters' like them in the morning!

Update: I couldn't wait any longer to give one a taste!  Sadly, I found my cute little pie to be a bit dry.  I think it would have been fine with a good cup of coffee, but it was way to late for me to be drinking coffee!  Also, I thought the nutmeg overpowered the rest of the flavors; Wanda disagreed.  At any rate, I think I would try this again, baking them for less time.

24 November 2012

Pie #22: Thankful Pie (Pecan Pie)

This week Perry and I were able to head home to spend some time with our families for Thanksgiving.  Without getting too mushy I must say that I am very thankful for not only my family, but also for Perry's family.  It's always wonderful to be able to catch up with the people that are important to me - whether via skype, around the dinner table, or in the family room watching 'slides'.

Since many members of our extended families live close to each other, Perry and I often have two gatherings to attend on holidays.  This year we started with lunch at the Lantzes, followed by fellowship with the Kings.  My project seemed like a good excuse to bring pie to the gatherings, so that's what I did (along with Brussels sprouts, which were a MAJOR hit!)  I don't recall eating pecan pie before, and definitely had not made one.  However it seemed appropriate to have pecan pie at Thanksgiving dinner, so with Kathy's  help that's what I made.  We had a good time and she shared several helpful pie and general kitchen tips.  I chose to use Kathy's mom's recipe from the King Family Cookbook; this recipe is less sweet than some pecan pie recipes.

%%%%%%%%%%%%%%%%%%%%%%%%%%%%%%%%%%%%%%%%%%%%%%%%

Pecan Pie

Ingredients:
single pie crust (8 inch)

3 eggs
1/2 c. white sugar
1 t. vanilla
1 c. karo (scant)
2 T. melted oleo
1/8 t. salt
1 c. pecans (slightly heaping)

Pie Algorithm:

1. Beat all but pecans in mixer.  Add pecans.

2. Bake in slow oven.  Start at 375F, then 350F for 40-50 min, or until firm.

%%%%%%%%%%%%%%%%%%%%%%%%%%%%%%%%%%%%%%%%%%%%%%%%


The pie turned out well, but I learned I do not love pecan pie.  I didn't dislike it; I just thought it was a bit plain.  Other people seemed to like it though, and I was given quite a few compliments.  Marvin (Perry's dad) even stated that he thought the consistency of the filling was just right!  I figure with all the Kathy-made pies he's eaten over the years, he must know what he's talking about!

In addition to the pecan pie I made a second attempt at the Disaster Pie from last week - this time using fresh cranberries.  It was a success - very delicious!  I would definitely recommend it.

17 November 2012

Pie #21: Disaster Pie (Cranberry Apple Pie)

Running the risk of being a bit over-dramatic, this week's pie is entitled 'Disaster Pie'.  I was hoping for a sweet/tart pie and was sadly disappointed.  After a long day of sending in job applications, my friend Katie and I headed to Giant Eagle to pick up some supper items.  This should have been a short trip; we only needed 5 things.  However after searching the produce section twice and finding it to be lacking cranberries I knew this trip was not going to go as planned.  I was sure I had seen the tart little berries occupying a whole produce display earlier in the week, so I finally gathered up the courage to ask the woman working nearby of their whereabouts.  She informed me that they had sold out.  It looked like my cranberry apple pie was going to be a disaster.  Katie and I went around the produce shelves debating the possibility of substituting each fruit in our pie.  In the end we simply decided to use dried cranberries.


If the absence of cranberries was the only issue, then this would not have been such a disaster.  But...there was more.  After running through all the needed pie tasks, Katie decided it would be safer for her to run the mandolin (slicer) than it would be for her to peel the apples.  She finished the first 1/2 apple without incident, and was well into her second when she exclaimed...."See, I am doing great!  Don't worry about me cutting myself, this is no problem!"  (Or something similar...remembering word-for-word details isn't one of my strengths...)  However, it was that second chunk of apple that bit her.  Well, I guess it wasn't the apple so much that bit her, as it was the slicer that bit her.  Now she exclaimed, "Uh, oh!  This is quickly turning out to be Disaster Pie!"  A bit of water and 3 band-aids later she was all doctored up, and had sliced the rest of the apples like a pro.  (I should note that the cut wasn't so bad that she needed 3 band-aids.  Rather, it was the wetness of the apples and the location of the cut that required so many!)


Now it's time for my confession - I haven't made a standard pie crust since Pie #15.  While I'm slightly ashamed about this, I also simply have not had time.  Some day I'll get back to it, but not today.  This brings me to the next disaster - we purchased shallow pie crusts.  There was no way that the 4 apples Katie sliced were all going to fit into the crust we purchased.  So, we did what any reasonable people would do...and make some cranberry apple crisp with the remainder!  (I guess this ended up being more of a crisis averted than a disaster...but hang with me, I'm trying to stick with the theme here!)


With all of this being said, I'm going to post the recipe I would have LIKED to have made.  The recipe ACTUALLY made used 1/2 c sweetened, dried (non-chopped) cranberries and 1/2 c sugar instead of what is listed below.  We also used a double crust instead of the crumble topping.

%%%%%%%%%%%%%%%%%%%%%%%%%%%%%%%%%%%%%%%%%%%%%%

Cranberry Apple Pie

Ingredients:
1 pie crust

1 1/2 c. cranberries, washed and coarsely chopped
3/4 - 1 c. sugar
4 apples (we used Cameo...they are delightful!)
juice from 1 lemon
1/2 T. dried orange peel
1 1/2 T cornstarch
3/8 t. cinnamon
dash nutmeg

crumb topping (see almond crumble topping from Pie #1, alternatively walnut would be good!)

Pie Algorithm:
1. Peel and thinly slice apples into large bowl holding lemon juice.  Add water until the apples are covered.  Set aside.

2. Mix all dry ingredients in separate small bowl.

3. Drain apples completely.  Mix apples, cranberries, and dry ingredients in bowl and let sit for 10ish minutes to juice.

4. Put apple mixture into pie crust.  Cover with crumb topping (or second crust if you prefer).

5. Bake at 400F for 15 minutes.  Turn heat down to 350F and bake for 45-55 min more.

%%%%%%%%%%%%%%%%%%%%%%%%%%%%%%%%%%%%%%%%%%%%%%


We ended up eating the crisp instead of the pie; it was delicious.   Katie and I both liked the orange flavor with the cranberries and apples as well as the walnuts we put in the topping.  However, I will say that I'm definitely looking forward to trying again when the store's stock of cranberries is replenished!


10 November 2012

Pie #20: Perry Chai Pie (Chai-Pear Pie)

Several weeks ago I promised I would write more about Perry's band.  The week has finally come.  Per has been enjoying 'noodling around' on his mandolin with his friends Steve and Phil.  They play a folky-bluegrass mix and call themselves Sour Cherry Pie.  My sister thinks its very funny to call them Sour Perry Chai; of course I had to jump on that idea for the pie project!  Kirsty leaves tomorrow for her 2 year voluntary service term in France, so we went home to have dinner with her one final time and to say, "Bon voyage!"


After looking through many pear pie, chai pie, and chai tea recipes online I finally created the recipe that follows.

%%%%%%%%%%%%%%%%%%%%%%%%%%%%%%%%%%%%%%%%%%%%%%%%

Chai-Pear Pie

Ingredients:
double pie crust

3-4 pears
2 T. fresh lemon juice

1/2 c. brown sugar
2 T. flour
1/2 t. salt
1/2 t. ground cinnamon (slightly heaping)
1/2 t. ground cardamom
1/4 t. cloves

milk
sugar

Pie Algorithm:
1. Peel and slice pears into large bowl.  Pour lemon juice on the pears.

2. Mix together dry ingredients in small bowl, then gently stir into pears.  When pears are covered, put into pie shell.  Cover with top crust, brush with milk, and dust with sugar.

3. Bake at 375F for 20 minutes, then turn oven down to 325F and bake for 25-35 minutes longer or until juice is thick and bubbling.

%%%%%%%%%%%%%%%%%%%%%%%%%%%%%%%%%%%%%%%%%%%%%%%%


This sweet pie has a unique flavor; I think it tasted good, but it wouldn't be my first choice.  In my opinion, heaping the cinnamon would be a step in the right direction.  Wanda on the other hand, thinks "it was seasoned just right" (without the heaping).  Perry has volunteered to eat the remaining half of the pie.  Merci beaucoup, mon petit chou!

03 November 2012

Pie #19: Cat-O'-Lantern Pie (Pumpkin Mousse Pie)


Fall is here.  Leaves are falling, fall flavors have hit the menus, and I need my mittens while I wait for the bus.  To celebrate, Perry and our friend Micah decided they wanted to have a fall party.  We ate delicious vegetable chili, drank freshly pressed and mulled apple cider, carved pumpkins (note Micah's fierce cat and Perry's shooting star!), and watched our toddler friend play with Ariel and Micah's black cat.  To top off the evening Ariel and Micah made pumpkin dessert - it was so delicious I decided to make it into a pie.

 The recipe this week originated from Kraft's website.


%%%%%%%%%%%%%%%%%%%%%%%%%%%%%%%%%%%%%%%%%%%%%%%%%

Pumpkin Mousse Pie

Ingredients:

crust:
2 cups crushed Gingersnap Cookies
2.5 T butter, melted
2 T sugar

filling:
1 cup cold milk

1 can (15 oz.) pumpkin

2 pkg. (3.4 oz. each) JELL-O Vanilla Flavor Instant Pudding

3/4 t. ground cinnamon

1/8 t. ground ginger
1/8 t. ground nutmeg
1/8 t. ground allspice

2 cups thawed COOL WHIP Whipped Topping

topping:
1/2 c. heavy (whipping) cream, chilled
2 t. sugar
1/4 t. vanilla extract

Pie Algorithm:
1. Crust: Mix 3 crust ingredients.  Press into 9in pie pan.  Bake for 5 min at 325F.  Let cool.

2. Filling: Beat first 4 filling ingredients in a large bowl with whisk 2 min.  (Mixture will be thick.)  Stir in COOL WHIP.  Place in cooled pie shell.  Refrigerate 4 hours.

3. Topping: Whip 3 topping ingredients until stiff peaks form.  Spoon onto pie. 

%%%%%%%%%%%%%%%%%%%%%%%%%%%%%%%%%%%%%%%%%%%%%%%%%

This is another tasty pie week.  The recipe is easy to make and has the familiar flavor of pumpkin pie - it just has a different texture.  The pie is also easily altered; you could try a graham cracker or vanilla wafer crust, or a pecan praline topping instead of the gingersnap crust and whipped topping suggested above.  With all this talk about altering the recipe, I actually need to confess.  I made this pie to take to our Fall Potluck at church, and accidentally forgot to mix in the cool whip and ended up with pumpkin pudding pie instead of pumpkin mousse pie.  Of course I remembered this step just after I had smoothed out all the pumpkin in the crust - one step too late to do anything about it.  Even with this little problem I left church with an empty tin and the compliment of my friends Grace and Matthew!  As the picture shows, there was plenty of extra filling without the cool whip.  The extra filling could be put into a second pie or could be put into small dessert glasses.

27 October 2012

Pie #18: Conference Pie (Chocolate Pots de Crème Pie)

Last week I went to the University of Georgia for the Design and Analysis of Experiments Conference 2012.  I really enjoyed attending this conference because the steering committee and organizers place a large emphasis on encouraging new researchers. I'm grateful for the welcome and advice from the experienced researchers as well as for the contacts I've made with other graduate students.

 I arrived to Athens in the late afternoon, after having flown over lunch.  Dinner was to be replaced with a snack reception, so I decided to venture out for a complete meal.  Prior to leaving Ohio I had heard rumor of a delicious vegetarian place; Urban Spoon recommended The Grit so I set on the 1.5 mile trek to find some delicious vegetables.  After needing to turn around once, and rerouting once due to a no-sidewalk situation I finally arrived.  Walking through the door I was greeted by a large display case full of cakes and pies; I knew Urban Spoon had suggested wisely!  (Hm, I think there's a statistical application here.  When unsure of the correct answer, go with the recommendation of the masses.  I'll cover more about this another day.)  At any rate, I chose the noodle bowl of the day (complete with vegetables, tempeh, and orange sauce), a delightfully sour lemonade, and a slice of sour cream chocolate pie.  I was in heaven - everything was delicious!  I wasn't quite sure what to expect from the pie - the filling was fairly solid, not like a pudding pie.  However, upon my first bite I knew I had tasted something similar before - my brother in law Travis's chocolate pots de crème.

Several years ago Trav came to visit us and we cooked up a storm.  One item we whipped up was the chocolate pots de crème that he made at his place of employment, Generous Servings.  When we made it together, I was so anxious to eat it that I wasn't able to wait until it set before digging in!  Being reminded of this recipe, I simply had to make it into a pie!

%%%%%%%%%%%%%%%%%%%%%%%%%%%%%%%%%%%%%%%%%%%%%%%
Chocolate Pots de Crème Pie
(Originally from Cooks Illustrated)

Ingredients:
1 graham cracker crust

filling:
10 oz. bittersweet chocolate, chopped fine
5 egg yolks
5 T. sugar
1/4 t. salt
1 3/4 c. cream
1/2 c. milk
1 T. vanilla
1/2 t. instant espresso powder, mixed with 1 T. water (omitted as Perry hates coffee)

topping:
1/2 c. heavy cream
2 t. sugar
1/2 t. vanilla extract


Pie Algorithm:
1. Place chocolate in medium bowl; set fine-mesh strainer over bowl and set aside.

2. Whisk yolks, sugar, and salt in medium saucepan until combined; whisk in cream and milk. Cook mixture over medium-low heat, stirring constantly and scraping bottom of pot with wooden spoon, until thickened and silky and custard registers 175-180 degrees, 8-12 minutes.

3. Immediately pour custard through strainer over chocolate. Let mixture stand 5 minutes to melt chocolate. Whisk gently until smooth, then whisk in vanilla and espresso.

4. Pour mixture into pie shell.  Gently tap against counter to remove air bubbles.  Cool to room temperature; cover and refrigerate.

5. Just before ready to serve, whip all topping ingredients until stiff peaks form.  Place in pastry bag with #4 star tip and squeeze a dollop onto each slice.

%%%%%%%%%%%%%%%%%%%%%%%%%%%%%%%%%%%%%%%%%%%%%%%

My life is running by at a sprinter's pace, so I once again purchased a crust this week.  (This is also the reasoning behind the boring pictures - no time to make sure I captured the pie well!)  Truthfully I liked the pots de crème better when it didn't have a crust.  It was nice to be able to serve the slices easily as the crust held the filling together nicely.  However, it was harder to enjoy the smoothness of the filling as the graham cracker crumbs mixed themselves in and made the filling feel gritty.

All in all, I cannot complain.  I LOVE this recipe.  While the chocolate is not super sweet, it is very rich.  This allowed me to enjoyed each slice with a steaming mug of coffee.  I would be interested in experimenting with combinations of other flavors - adding the espresso, mint, amaretto, almond, others?  I think any of the above would be delicious either mixed with the chocolate, or in the whipped topping!

18 October 2012

Pie #17: Columbian Cookie Pie (Dulce de Leche Pie)


Last week my friend had a Columbian-themed fundraiser meal, for which my contribution was dessert.  For a while I toyed with the idea of making pie...but just couldn't justify the breaking of the theme to satisfy my blogging requirements.  Instead I made some very tasty Columbian cookies called Alfajores which I found on a blog entitled My Columbian Recipes.  The recipe calls for dulce de leche, and even included a recipe to make it from scratch.  It was during the 3 hour cook time that I figured out what my pie would be this week.  I scoured the internet for a dulce de leche pie, and while there were many such recipes, I settled on one from the Big Red Kitchen.  I ended up using the basic pie composition from the Big Red Kitchen, but the dulce de leche recipe from My Columbian Recipes.


%%%%%%%%%%%%%%%%%%%%%%%%%%%%%%%%%%%%%%%%%%%%%%%%

Dulce de Leche Pie

Ingredients:
1 chocolate cookie pie crust (this week it was purchased pre-made)

6 cups whole milk
1.5 cups sugar
1/4 t. baking soda
1/8 t. salt
1 cinnamon stick

2 cups heavy whipping cream
1 t. vanilla
2 T. powdered sugar
8 mini Heath Bars, crushed (Perry was a trouper; he took care of this task for me with his hammer!)

Pie Algorithm:
1. Dulce de Leche: In a medium pot, combine all ingredients and bring to a boil.  Reduce heat to medium-low, stirring frequently with wooden spoon for about 3 hours or until color changes to caramel and the mixture is thick as a pudding.  Let it cool slightly.  Pour caramel sauce in crust.  Finish cooling to room temperature.

2. Topping: Whip cream, vanilla, and sugar.  Put on top of cooled caramel.  Top with crushed heath bars.  Refrigerate until consumption.

%%%%%%%%%%%%%%%%%%%%%%%%%%%%%%%%%%%%%%%%%%%%%%%%


A few notes about the dulce:
1. This is a good thing to make when there are other things you need to be doing nearby.  It doesn't require much attention except for the very beginning and very end (other than to stir every so often).

2. At the beginning, watch carefully when the pot is about to boil.  The milk expands quickly after a certain temperature and can easily create a sticky stove!

3. At the end don't rely on your timer; instead pay more attention to the thickness of the sauce.  Watching and continuous stirring are important in order to prevent crystallized caramel.

4. I ended up not quite using all the dulce de leche made.  (I saved approximately 1 cup.  This will last approximately 1 week in your fridge.)  The sauce is very sweet - use whatever amount you would like/you can stand in your pie!


Did the pie taste delicious?  Well, I didn't get to taste the actual pie as Perry ended up taking it to work.  However I did use some of the leftover dulce with a bit of whipped topping and crushed candy.  It was delightful - very rich, but very delightful!  As far as the actual pie, Perry remarked that it was gone by 7:15am the morning he took it in.  Based on this observation, yes - the pie did taste delicious!

12 October 2012

Pie #16: Gross Pie (Green Tomato Pie)


While many of the pies I've made so far have been new to me, most of the recipes have been selected/created because I think they will be delicious.  This week I'm in new territory; prior to starting this pie, nothing seemed delicious about it.  But being up for a new adventure, I decided I to act on the green tomatoes in the garden before frost nipped them.  My friend Kathy has found and shared several recipes from The Columbus Dispatch - Green Tomato Pie being one of them.  Thus, I was set!


%%%%%%%%%%%%%%%%%%%%%%%%%%%%%%%%%%%%%%%%%%%%%%%%%

Green Tomato Pie
The Columbus Dispatch
submitted by Karen Hughes, Galloway


Ingredients:
crust for 1 double-crust pie

2 pounds green tomatoes
juice of 1 lemon
1 1/4 cups plus 1 T. sugar
3 T. flour
1/2 t. nutmeg
1/4 t. ground cloves
1/2 t. cinnamon
2 T. butter
1 egg white, lightly beaten

Pie Algorithm:
1. Preheat oven to 425F.

2. Thinly slice tomatoes.  Place in a large bowl. Pour boiling water over.  Let stand 3 minutes.  Drain.  Pour lemon juice over tomatoes.

3. Mix 1 1/4 c. sugar, flour, nutmeg, cloves, and cinnamon together.  Sprinkle over tomatoes.  Toss lightly to coat.

4. Arrange 1 crust in bottom of pie dish.  Fill with tomato mixture.  Dot with butter.  Cover with second pie crust.  Crimp edges.  Brush lightly with egg white.  Brush with remaining 1 T sugar.  Cut slits into pie vent.

5. Place pie on baking sheet.  Bake 25 minutes.  Reduce oven temperature to 350F.  Bake 20 minutes longer or until top is golden brown.

%%%%%%%%%%%%%%%%%%%%%%%%%%%%%%%%%%%%%%%%%%%%%%%%%

Remember that old saying about 'If you don't have anything nice to say, then don't say anything at all?'  This could be a short blog!


At first I was excited about trying this pie.  The tomatoes were several different beautiful shades of green so I figured the pie would be beautiful!  Plus, there was so much sugar added that I figured any hint of tomato flavor had to be wiped out by the sweetness of the pie.  (Remember the Surprise Pie?  I thought that if you can make a tasty pie with zucchini, then surely you can do the same with green tomatoes!)  However my excitement diminished when I got to step 2 and smelled the tomatoes sitting in the boiling water.  Couple this smell with a store-purchased crust (used to save some much-needed time this week), and we have one Gross Pie!


Later that evening, I tried that pie with Perry and Grandma Dixie.  Perry was the bravest, and tried it first.  (Though he wasn't so brave that he could eat it with his eyes open!)  His comments were that if you didn't see the tomatoes, the pie tasted like apple.  This made sense with all the sugar and the spices added, so Grandma and I tried ours.  Grandma agreed with Perry - the pie tasted a lot like apple.  She didn't ask for more, but also didn't seem to mind the pie.  I was not so easily tricked - while the spices did taste a lot like apple, the texture of the tomatoes was awful.  They were slimy and chewy and reminded me of my meat-eating days.  Perhaps this was a result of the pie not baking long enough?  Seeing as I don't plan to make/eat another green tomato pie in the near future, I'm not convinced I will ever know.


I made a second, smaller pie to share with my recipe-bearing friend Kathy and her husband Al.  I realized last week that Al is my secondary pie tester; it seems that he is the person to have tested the most of my pies, only second to Perry!  I really like both Al and Kathy, and I hope that sharing this with them doesn't put a damper on our friendship!

Here's to creating something more delicious next week!

06 October 2012

Pie #15: Truly Taupe Pie (Plum Pie)

This week I spent a chunk of my evenings painting my church lobby a color called 'truly taupe'.  No matter how many times people told me the color was a shade of brown (not purple or grey as I saw), all I could think about was making a plum pie to match the purplish color of the wall.  Thus, we have the pie of the week!

In news relating to my other year-long project (my research)...September was a rough month.  This week however, I had a major break-through.  My designs are performing well, and I'm back to cranking out results!  Needless to say, I'm very excited!  Now, back to the pie...


%%%%%%%%%%%%%%%%%%%%%%%%%%%%%%%%%%%%%%%%%%%%%%%%

Plum Pie

Ingredients:
2 pie shells

plums (around 6 cups sliced - perhaps 12ish plums?)
1/2 + 1/8 cups sugar
1 T. lemon juice

2 1/2 T. cornstarch
1/4 t. salt
1/8 t. ground cloves
1 t. cinnamon

milk
sugar in the raw

Pie Algorithm:
1. Wash, pit, and then slice the plums to about 1/2 inch thick.  Mix plum slices, 1/2 c. sugar, and lemon juice in a bowl.  Let sit to juice.

2. In a separate bowl mix 1/8 c. sugar, cornstarch, salt, cloves, and cinnamon.  After mixing well, combine dry mixture with the plums. 

3. Put plums in pie shell.  Cover with remaining shell, brush with milk, and sprinkle with sugar in the raw.

4. Bake at 425F for 25 minutes, then turn down to 350F and bake for 30 minutes more (until thick and bubbling).

%%%%%%%%%%%%%%%%%%%%%%%%%%%%%%%%%%%%%%%%%%%%%%%%

Perry thought this pie was a bit tart; he's looking forward to eating the rest with ice cream!  An alternative would be to simply add more sugar to the recipe.

The pie ended up being red instead of purple as I had envisioned, but it still had a nice flavor.  I wouldn't typically think of making/eating a plum pie, but now that I've made one I think I would make it again.

25 September 2012

Pie #14: Arrival Pie (Pear Pie)


I have an insatiable desire to become an expert.  I don't want to make pies that are mediocre; I want to make perfect pies - every time.  Likewise in my research life I want to learn everything about the design criterion I created (and if I'm honest I want to learn everything about all the other criteria that are remotely connected to my criterion too)!  I love the learning process that it takes to become an expert - the research put in, the progress made, and the end result.  I don't particularly love the part of the process where learning exhibits as failures, yet this is also part of the process.

In the past 3.5 months of pie baking I have had several instances where I've thought to myself, "Erin Rae, I think you've arrived - you have mastered the art of pie baking."  Typically those thoughts are quickly followed by a crust that won't roll out, a pot of butter that turns to powder, an oven bottom covered in burnt filling, or some similar tragedy.  Sadly this also happens in my research life - I get to a point where I realize how much ground I've covered in the past year, and then my code breaks or another theoretical problem rears its ugly head.

Secretly I think the process is what keeps me coming back for more.  What is the fun in arriving - once an expert, what remains?

%%%%%%%%%%%%%%%%%%%%%%%%%%%%%%%%%%%%%%%%%%%%%%%%

Pear Pie

Ingredients:
1 unbaked pie shell

sliced fresh pears
1 cup sugar
4 heaping Tablespoons sour cream
1 teaspoon lemon juice (or a little more)
1/3 cup flour

lemon peel
cinnamon
nutmeg

Pie Algorithm:
1. Slice fresh pears into shell. 
2. Mix flour, sugar, lemon juice, and sour cream.  Pour over pears. 
3. Sprinkle with lemon peel, cinnamon, and nutmeg.
4. Bake 60 minutes at 375F.  Smack your lips and eat.

%%%%%%%%%%%%%%%%%%%%%%%%%%%%%%%%%%%%%%%%%%%%%%%%

My family made many pear pies with this recipe when I was growing up.  The pie is very easy to make and takes very little preparation time.  It is one of my absolute favorites.

22 September 2012

Pie #13: Peace Pie (Salty Caramel Apple Pie)

Several weeks ago my friend Savannah made salty caramel birthday brownies for me.  They were very good and have been on my mind ever since.  Of course I've been searching for a way to incorporate salty caramel into a pie.  I toyed with the idea adding it to chocolate, pecan, apple, or a caramel-based pie (among several others).  Then it hit me - I would make a salty caramel pear pie!  I loved the idea of salty and caramel mixing with the delicately sweet pear, and looked forward to it all week.


Adding a little bit of pressure to the week was the fact that this pie was going to be shared at Peace, Pies, & Prophets, a comedy fundraiser for Christian Peacemaker Teams featuring the comedy performance of Ted and Co. and opened by the musical performance of Sour Cherry Pie.  (Yes, that's a shameless plug for my husband's band - more to come on that in a future week.)  At this event there will be pies up for auction as well as pies to be consumed on site.  Knowing people are hoping for tasty pies, I decided a practice pie was a necessity!


This week turned out to be a week of changing plans.  I purchased some not-quite-ripe pears towards the middle of the week only to find that they still weren't ripe at the end of the week.  Going with a backup plan, we now have salty caramel apple pie.  I also debated whether I wanted to create my own recipe or follow one that I found online on the Cooking Channel's website.  It looked delicious and I figured it would probably turn out better than the pie in my head, so I decided to go with it.  However, I simply couldn't make their caramel turn out right.  Therefore, the actual pie will have a variant of my family's caramel recipe (that I've been successful in making previously).  Grabbing some ideas from the recipe online and some from Aunt Lu's caramel recipe we have this week's pie.


%%%%%%%%%%%%%%%%%%%%%%%%%%%%%%%%%%%%%%%%%%%%%%%%

Salty Caramel Apple Pie

Ingredients:
2 pie crusts

1/2 cup sugar (white)
1/2 cup Karo
1/2 cup heavy cream
1/2 stick butter
splash vanilla
1 1/2 teaspoon sea salt (ground coarsely)

2 lemons
5-6 medium to large apples

1/3 cup raw sugar
2 Tablespoons flour
1/4 teaspoon cinnamon
1/4 teaspoon allspice
1/8 teaspoon grated nutmeg

milk
raw sugar
sea salt (ground coarsely)

Pie Algorithm:

1. Apple Seasoning: Mix sugar, flour, and spices in small bowl.  Set aside.

2. Juice lemons into a medium bowl and add some water (about 1.5 cups). Set aside.

3. Caramel: Combine sugar, karo, half of cream, and butter.  Bring to a boil and add other half of cream slowly.  Cook slowly to 230F*.  Remove from heat and mix in vanilla and sea salt.  Let sit while preparing apples.

4. Apples: WORKING QUICKLY (but not so quickly that you slice your finger), core, peel, and thinly slice apples - a mandolin slicer works quite well!  Put slices in lemon-water bowl, making sure they have been coated with the lemon juice.  Drain the apples well, and mix the spices into the apples by hand.

5. Place 1/3 of the apples then 1/3 of the caramel in the shell.  Make sure to stir caramel each time so all the salt doesn't settle to the bottom of the pan.  Also apples should be stacked in a way that minimizes open space.  Continue to layer 1/3 apples and 1/3 caramel two more times.  (Save a bit of caramel for the top crust!)

6. Lattice the top crust on the final layer of caramel.  Brush with a bit of milk, sprinkle with some sugar and salt.  Drizzle remaining caramel over the entire pie.

7. Bake at 375F for 20 minutes, then turn the heat down to 325F and bake for 25-35 minutes more.  (Cook until apples are just soft.)  Filling may bubble over - a pan under the pie helps alleviate an oven covered in burnt caramel!

*When making caramels as candy, you want to bring your liquid to 240F (soft ball stage).  However, because this batch of caramel was going to bake for a while longer I decided to heat the caramel only to 230F in the hopes of preventing another surprise - salty toffee apple pie!

%%%%%%%%%%%%%%%%%%%%%%%%%%%%%%%%%%%%%%%%%%%%%%%%


 The pie pictured at left is the mini-tester pie.  Overall it had a good flavor, but the caramel was too buttery for my taste.  As mentioned earlier I had trouble making the caramel turn out - the first batch turned to powder and the second batch was on its way to powder so I quickly threw in the cream.  Thus it never had the chance to brown and appears visually absent on the pie.  The flavor was there though and while I'm not a huge apple pie lover, the mixture of salty caramel and apple was definitely a plus!  Note the very thin strata of apples!


Pie update:  After waking at 6AM to make my second attempt (pie at right), I was really hoping this pie (the caramel specifically) would turn out better.  I am very hopeful!  While I haven't yet tasted this version, it appears to have turned out just as I had hoped!  We'll see if the crowd likes it!

15 September 2012

Pie #12: Belated Birthday Pie (Ground Cherry Pie)

One year ago I celebrated my birthday with a room of academics who study computer experiments.  We were participating in a conference at Isaac Newton Institute for Mathematical  Sciences in Cambridge, UK.  The traditional conference dinner occurred on the evening of my birthday, and (unbeknownst to me) my advisor was informed that it was my special day.  Since he was one of the organizers of the conference, he stood up to make the typical conference organizer 'Thanks for your participation in this conference' speech and at the end asked if anyone having a birthday would make themselves known.  I was the only one - at least the only one who came forward.  Luckily I was quick on my feet and was able to divert my embarrassment with a laugh by thanking everyone for attending my party.


This story yields the perfect set-up for a probability problem:  Say there are 100 computer experimenters in a room; what is the probability that any two of them will share the same birthday?  The short answer (with a few distributional generalizations) is 0.9999997.  If you'd like to see the math at work, see Wikipedia or feel free to set up an office hour with me.  Note that the question above is a very different question than asking 'What is the probability that someone else at the banquet (one of the other 99 people) has the same birthday as myself?'  This answer is a less surprising 0.2378.


Now that our probability lesson is over, let's talk pie.  The conference banquet ended with a dessert decorated with two little small fruits.  Everyone around me made guesses as to what they were: mini tomatoes, tomatilloes, etc.  I knew instantly what they were - ground cherries!  No one sitting near me had heard of a ground cherry before yet there the little fruits lay.  They were still connected to their shell which was peeled back one panel at a time - much fancier than the ground cherries I'd previously encountered.
 

My first memories of ground cherries are connected to my great-grandma Lantz (aka Granny).  I loved to visit her on the farm.  We would drink water from her well using the tin cup that hung outside her shop, gather eggs from the chickens, pick golden raspberries out by the truck-patch, and play with her very shaggy and very matted dog Queenie.  It is Granny's recipe that I used to make my belated birthday pie. 


%%%%%%%%%%%%%%%%%%%%%%%%%%%%%%%%%%%%%%%%%%%%%%%%

Ground Cherry Pie

Ingredients:
1 pie crust (9-inch)

ground cherries
1 c. sugar
3-4 eggs
1 T. flour
1 c. milk

Pie Algorithm:
1. Stir sugar, eggs, and flour.  Add milk.

2. Put ground cherries in unbaked pie shell (1 layer deep) and pour mixture over top.

3. Bake at 400F for 10 minutes then reduce to 350F for 40 more minutes.

*Note: My family often makes this as a raspberry pie instead.  Other berries would probably be just as delightful!

%%%%%%%%%%%%%%%%%%%%%%%%%%%%%%%%%%%%%%%%%%%%%%%%


I want to extend a special thanks to my parents who allowed me to use their ground cherries - which have been growing like the weed that they are.  Also, thanks to Wanda for the lovely pie pictures from Pie #11 and Pie #12!